Tuesday, April 5, 2011

watercolors to go

Every winter my dear friend Catherine Newman gives my kids the most inspired gifts- both handmade and boughten.  Last year she gave Ava a fantastic book called An Illustrated Life, a book about illustrated journaling and sketchbooking and it was a huge source of inspiration for her.  When I get her permission, I will post some things she has been working on, but for now I will share with you a little gift that I am currently making for her as she fills her personal sketchbook with beautiful and funny and original work of her own.  There was an idea for this in the book that an artist shared that I have changed a bit but it will allow her to carry water colors with her and as long as she can find some water (usually not difficult) she can transform her black line drawings into something even more spectacular.  And, it's easy, to boot.

What you'll need:
  1.  a metal tin (I used a tin that a pair of scissors came in, which was a perfect fit for the "fantastix") polymer clay (sculpey or fimo- go for the soft type).
  2. tubes of watercolors (I went for the cheap type from Michael's for this first try but you could use fancy ones)
  3. Coloring tools such as "fantastix", which are inexpensive and you can find at any art or craft store. They are basically pens without the ink.  The body is filled with a sponge that holds water so you fill it with water and then can use it with the water colors without having a jar of water for your paintbrush.  You could even watercolor in the car!
  4. White metal paint OR a piece of white plastic cut from a tofu or yogurt container that is large enough to fill (or mostly fill) the top of the tin (this is for mixing colors- you want white for that).
  5. A tube of lip balm (you'll see why).
How to make it:

  1. Take one pack of white polymer clay and break in half.  Roll each half into a snake as long as your tin.

Smoosh them so they are flattened along both long sides and then take your lip balm and press 6 wells into each smooshed snake of clay (use the top of the lip balm that is flat).


2. Follow the manufacturer's directions and bake the clay inside of the tin.  After this cools, you can fill the wells with paint.
3. Fill the wells with paint.  Tap the whole thing to flatten the paint into the wells, or use something (like a paintbrush) to flatten it.  Allow this to dry and it will be ready to use.


4. Paint the top of the lid with white metal paint or glue in a piece of white plastic to provide a white area to mix colors.

5. Now it is ready to go.  If you need to, tie a piece of string or use a rubberband to keep the lid secure.  

If you can't find a long tin like this one, you could always just carry the color sticks in your pencil/pen bag.


Monday, February 14, 2011

hitting "send"

I just took a walk where I concentrated on standing up really tall- stretching my spine and opening my chest.  The snow was deep and my dog was joyful and I was talking a walk. Because I had some time to. Because my sewing machine is switched off. Because Debra (my pal and co-author) is getting all 101 projects into the "finals" folder right now. Because we are sending the manuscript for our book today.

I had to write a little today right here.  I don't keep a journal.  I can barely keep my breath, these days.  I just worked harder than I have ever in my whole entire life worked and I am feeling good.  I'm not actually done, as only half of the finals are done, but the biggest push is over. Storey will have the manuscript in their virtual hands today and I took a walk (and mucked the pig pen, but that was not nearly as picturesque, nor was it a thoughtful time).

On my walk I thought about the creative process, as I have been pondering a lot lately.  I don't think I had any idea how big an undertaking this book would be, but as I developed and made the 101 sewing projects that I would  want to have in a book with my very own name right on the front, I eventually came to see what it meant. Do you know how in Chinese Checkers you sometimes make these fantastic moves where you go backwards and forwards and jump, jump, jump and then you get to your final spot all happy and smug and someone points out that you could have jumped once and gotten to the same place?  Well, where is the fun in that? I have found that sometimes I need the crazy circuitous route to figure out just how simple something can be.  I actually had that experience quite a few times while developing these projects.  I hope the end result is a simple project that has a big payoff.

So, I got to stand up straight and get warm this morning.  Now I will go sew in that inevitable posture.  I will not work for 12 hours today.  I will be smiling.

And, here is something to look at.  My boy in his Valentine's cashmere sweater I upcycled and remade to fit him.  Yummy boy. I'll tell you how its done soon.
silly

Sunday, November 14, 2010

100 Friends

I have this fantastic cousin (second cousin or 1st cousin once removed- does anyone know how that works?)named Marc Gold who just came to stay with me for the first time ever. It was probably the first time I have ever hung out with him without a whole family event going on and it was one of those moments where you realize that you have just made a connection that will have a really meaningful impact on your life. I could easily start telling stories about him and his life choices, and the multitude of funny things that he's experienced that were so funny and well told that I could probably re-tell them and they would still be funny. You might not know me, but that isn't my strong suit. I'm one of those people who accidentally tells the punchline before the joke. Anyway,I want everyone to know about his work and I hope you will follow the link to his website.

He is a world traveler and altruist. He is a one man show providing people in need with what he raises through his project called The 100 Friends Project For the past 22 years, he has been travelling to a wide variety of countries distributing funds for people who are in great need and some organizations that help them. Sometimes his work is pure charity- he will literally hand someone some cash to help them live through a winter, or he might buy someone a bike so she can get to school or work. Sometimes he sets people up with something that will give them more opportunities to better their situation or follow a dream. He pays the tuition for a poor village girl's education, or buys medicine that helps to save a life (sometimes that might only cost him a dollar- no kidding). He contributes a bigger sum annually to a place called the Center For Children's Happiness that helps the children who were living in the garbage dumps of Phnom Penh- he says he can see lives transformed in a short time. He builds schools, libraries, and community centers. He gives micro grants to folks so they can start businesses. He only asks for people to pay it forward and he has amazing stories about that aspect alone.

He raises money by holding fundraisers here in the States. I just held one for him last Friday, where he told stories and had a slideshow. He also has had some documentaries made on the work he is doing, which you can find on his website.

This man and his organization are the real deal. He raises money and gives the money out where he can. He is well connected and has a large network of people in many many communities that he can trust to help him decide where his money might do good work. I hope you find his work interesting and might give him a bit to help him do it. He has told me what $5 can actually do and it is astounding.

Wednesday, August 4, 2010

ring

I recently finished up work on a feature for Family Fun about New Craft Products on the market and the gal who tests them for the mag- ME! Trying to get over my vanity (read: not in love with the pictures of me)I invite you all to check out the September issue and see the projects I created for the piece- there are some good ones! One thing I tested was the new Mod Podge Dimensional Magic, which is a 3D glaze that you use like resin, only it isn't toxic and tricky. I liked it a lot and made some rings for my sister-in-law and myself. Here's the tute. Easy and satisfying with great results!

What you'll need:
-ring blanks with a bezel (I actually got these at Michael's Crafts and they claim to be lead free, so...)
-fabric
-embroidery thread and needle
-Mod Podge Dimensional Magic (in stores now, I believe)
-Mod podge

What to do:
1) Cut a piece of pretty fabric to fit into the bezel cup thingy.

2) Stitch your initial or a design on it with contrasting embroidery thread.
3) Use mod podge to stick the fabric to the bezel. It should fit snuggly and have no wrinkles.

4) Rig something up so you can make your ring stand up and have a flat top. This is important for the next step. You also will need to leave the ring to dry without moving it for a few hours, so be sure it's in a good place out of direct sun and dust.
5) With the application tip of the Dimensional Magic pointing down, fill the bezel. To avoid making bubbles, try to make a continuous stream. Fill to top of bezel so it domes slightly. If there are bubbles, wet your finger and touch it to the bubble. It should pop.

6) After the gluey stuff is dry (a few hours) you may need to apply another thin layer as the stuff sometimes sinks when it dries.

A book!


Enough with the hints and announcements of big news to be announced! Enough, already! I am so very excited to tell everyone that I have been offered (and you better believe I have accepted) a book deal from the fantastic Storey Publishing. Do check out all of the great books they have published because if you are here, then you probably lean towards the kind of lifestyle that Storey publishes books about- DIY and the love of making stuff. When I looked through the shelves in their office I realized that my husband and I have tons of books they have published- from animal care and carpentry to food and crafting. They are a creative bunch with a keen vision and I really couldn't be happier to be working with them. They are located in the MassMoca complex so going to meet with them means a visit to an excellent museum in the hills of Western Mass. It isn't that I don't love going to NYC, but I do love the less hectic drive and destination of North Adams on most days.

So, you must be wondering, just what kind of book is this going to be? Well, I think it is the book most people who sew or dream of sewing want. It will have 101 projects that you can make in anywhere from 15 minutes to a day. So you can whip up a cool and creative gift right before heading to the party or you can set aside an afternoon or two to make something quite substantial- like a quilt or throw rug or a new fancy frock. On top of that great promise, what you make will be super original because I am going to explain how to embellish simple fabric and add interesting and unusual elements to really put you name on the piece. I love designer fabrics (so much) but I do feel like they limit how original you can make something. Of course, all of the projects can use whatever gorgeous fabric you want, I'll just show you how to transform cheap muslin and canvas and decorate other fabrics to make them stand up on their own.

So, I have been a busy gal- lots of first run sewing going on in the steamy studio. It is tricky to find time to post here, but I will be giving sneak peeks of projects that will be included in the book, and tutorials on extra projects that you might like.

Thursday, July 22, 2010

fortune cookies

Uh, it seems that someone working in a fortune cookie factory reads my blog. Really, I am so excited for every comment but when I google translate some of them, they are like this:
Can impart knowledge, wisdom can not. Each person must be his own.

and this:

Happiness is not everything, people have a responsibility.

They don't seem to actually relate at all to my crafting and posting and I do wonder what the story is. My daughter loves it anyway, though sometimes when I hit translate I hope it isn't porn (and it has been).

Monday, July 19, 2010

camp

Our annual camping trip to Cape Cod with our dearest friends was last week and it was great. The amount of relief I felt when we pulled in to the same site we have been at for years now was nearly overwhelming. It's a spot where all the regular routine we can get mired down in vanishes (replaced by another routine, but the change is refreshing, indeed)and we can just smell the woods and the smoke and sing and eat and swim and laugh and debate and bike ride and scooter and wonder if today will be a day that we will successfully poop (tmi? sorry).

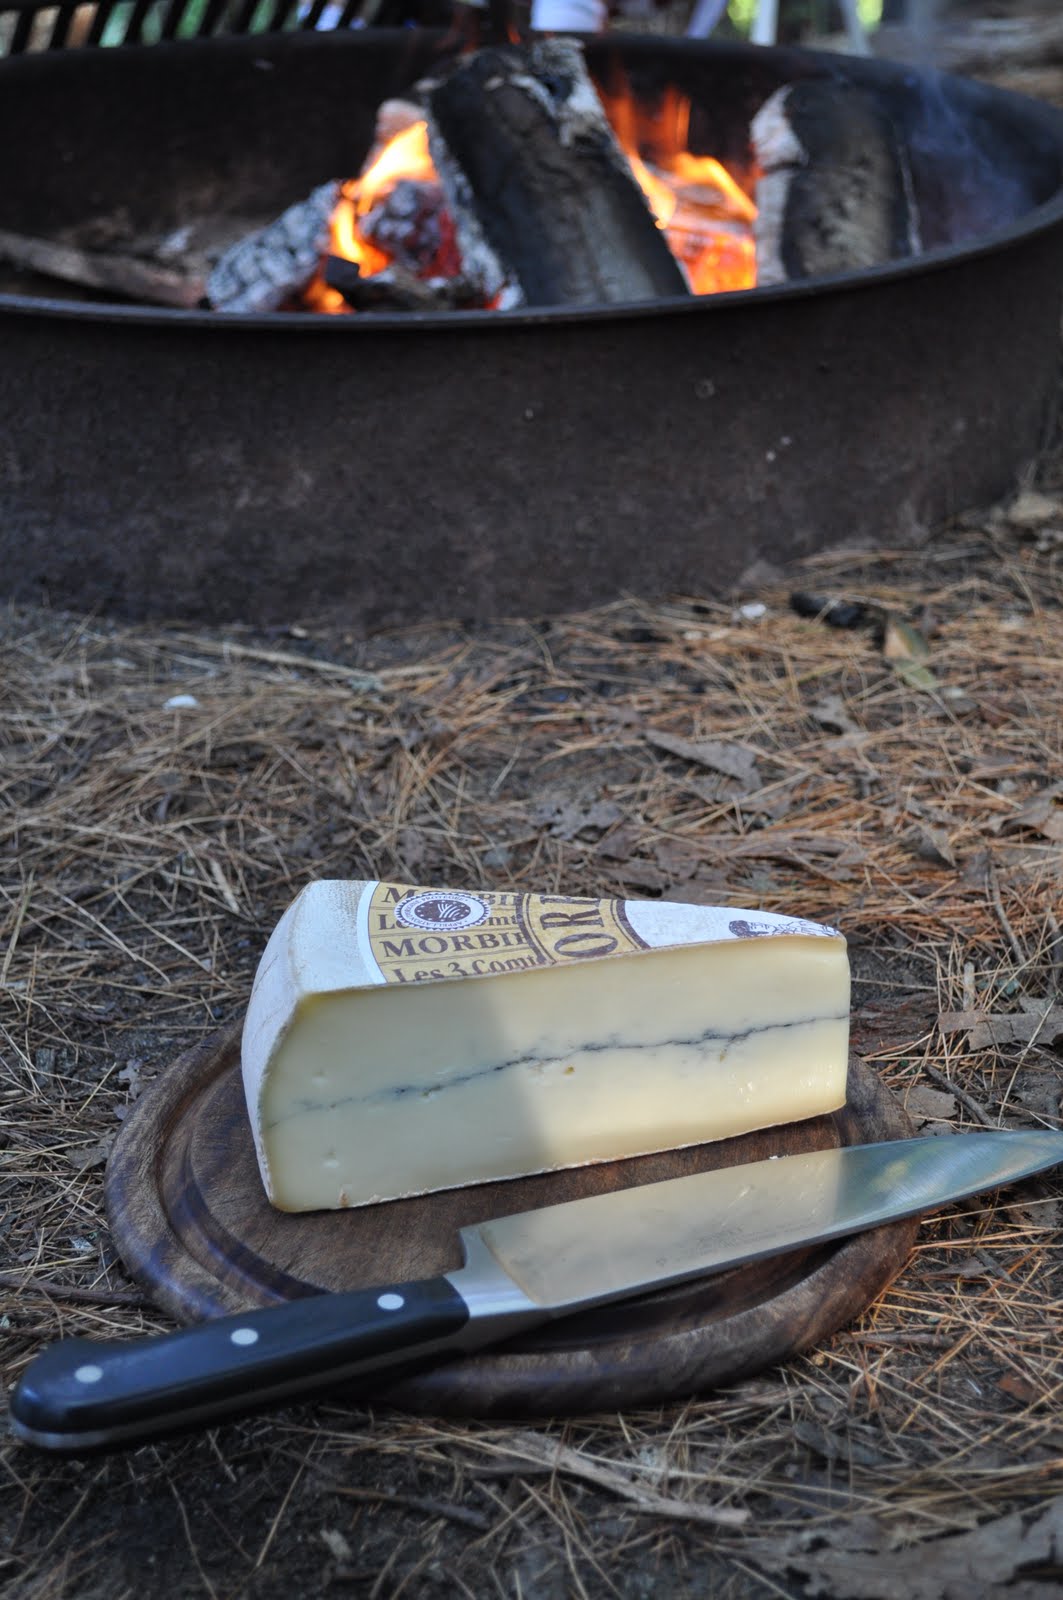
Food: Probably the biggest consideration when planning our trip and we have gotten it down to a science. Of course we eat out for the fried seafood need, but at the site we also eat seafood purchased at a nearby fish shop and cook it over the fire in foil packets- oh yum! But my favorite meal for it's decadence and ritual is Raclette night. Apparently there is a Raclette cheese shortage right now, so says the cheese girl at Whole Foods, so we brought Morbier this year instead and it was soooooooooooo good. We stick the wedge of cheese on a log next to the flames of the campfire and allow the fire side of it to melt.

Meanwhile, we boil new potatoes and set out little cornichon pickles and olives.

So, melted cheese all over the spuds with the sharp olive and cornichons and wine and we are truly happy campers- happy campers who anticipate the dreaded cheese ball that inevitably forms in our bellies. Totally worth it.